September 25, 2012

Honey, Garlic & Soy Glazed Baked Chicken (With Photos)

This is a super simple, extra delicious way to prepare drumsticks or leg quarters. The sweet and salty flavors of honey and soy go so well together. Then you just kick up the flavors by adding a citrus and peppery blend. This also makes for a delicious coating for chicken wings. A sprinkle of sesame seeds on the wings will give the chicken wing appetizer a lovely Asian flair.

I am doing this recipe today with leg quarters.

Honey, Garlic & Soy Glazed Baked Chicken

1/2 cup soy sauce
1/3 cup honey
1/3 cup fresh lemon juice
1 clove garlic crushed and finely minced
1 teaspoon dried basil
1 teaspoon crushed red pepper flakes
1 tablespoon olive oil

In a bowl, whisk all of the ingredients well. I have about 4ish, beautiful little free-range cuties for my dish. Place washed leg quarters into a zipper bag and pour mixture over the chicken. Seal the bag and place in the refrigerator for at least 3 hours. The longer it marinates in this mixture, the better the flavor.
Chicken after marinating for 5 hours


Preheat oven to 180C

Place the chicken in a baking dish and cover with foil. Bake for 45 minutes or until juices run clear. Uncover and place back into the oven to let the glaze get nice and brown and sticky on the chicken pieces. The glaze thickens and turns a glorious deep, dark reddish-brown and the flavor is divine!!


This can be served with almost any side dish. I am having mine next to some delicious red beans and brown rice tonight! Mmmmmmmmm!!!


Now...

Go, eat!!

If you enjoy the recipes, please share my blog with your friends. If you have a recipe you'd like to share in Friendly Foods, please send it in. Photos are also appreciated! teedycooks@gmail.com

August 24, 2012

Teedy's Gigantic Awesome Oatmeal Cookies! (With Photos)

I've never been an extraordinary baker but I can make some hell-fire cookies! The cakes I bake taste pretty good but they usually come out looking like a but if a disaster. My husband, Peto, is an excellent baker, so his help is making my cakes look a bit better.

I always make a huge array of cookies for Christmas to share ith family and friends. My specialties are Double Chocolate Chip and Peanut Butter with Chocolate Toffee Chips. This recipe is one that I created recently to put a spin on my basic Oatmeal Cookie Recipe. The addition of something as simple as almond extract makes for a rich fantastic flavor.

When I give cookies as a gift I tend to make them bite sized or standard. When I make cookies for at home consumption, I make them GIGANTIC!!!!

This recipe makes 24 standard cookies or 12 Gigantic cookies

Teedy's Gigantic Awesome Oatmeal Cookies!

1 cups all - purpose flour
1/4 tsp baking powder
1/2 tsp baking soda
1/4 tsp salt
1/4 cup margarine
1/4 cup vegetable oil
1/2 cup packed brown sugar
1/2 cup white sugar
1 egg
1 cup oats
1/2 cup semi sweet chocolate chips
1/2 cup coarsely chopped walnuts
1/2 tsp vanilla extract
1/2 tsp almond extract

Preheat the oven to 350F (175C). Sift together flour, baking powder, baking soda, and salt; set aside.

In a medium bowl, cream margarine, oil, vanilla and almond extracts, brown sugar, and white sugar until smooth. Beat in eggs one at a time. Gradually stir in the sifted ingredients until well blended. Mix in oats, nuts and chocolate chips. Drop from a tablespoon onto ungreased cookie sheets. I like to make nice large balls and flatten them just a bit. I love GIGANTIC cookies!!!

Bake for 10 to 12 minutes in preheated oven, or until edges are golden. Let set up on the cookie sheets for a few minutes before transferring to wire racks to cool completely.

Enjoy them with a glass of cold milk or my favorite, a cup of steaming dark roast coffee. Mmmmmmmm....
Now...

Go, eat!!

If you enjoy the recipes, please share my blog with your friends. If you have a recipe you'd like to share in Friendly Foods, please send it in. Photos are also appreciated! teedycooks@gmail.com

August 14, 2012

Citrus Water, Ginger Chicken, Couscous & Spicy Cabbage (With Photos)

First I will begin this little food exploration with the Citrus Water. A great way to make water more appealing and delicious is by dropping in fresh fruit. Almost any fruit can be added to water to make it tasty and gorgeous! Some people who have no interest in drinking water need a little encouragement. My favorites are, lemon and red grapefruit, melon and cucumber, red and green apple & green grapes and strawberry. The one I choose for this dish is lemon and red grapefruit because it compliments the flavors in the Ginger Chicken.
 
Add a few slices to your water and put it into the fridge until its time for dinner. You want it to sit for a while so that the fruit can lightly flavor the water.
 
Now onto the chicken!
 
This is an easy dish yet full of flavor. It makes a good weekday meal but can also be served for an intimate dinner party with friends. Just add a nice bottle of white wine.
 
I don't have this in true recipe format, but it's easy to follow.
 
I like to get nice large boneless skinless chicken breasts and that way you only need one per person. I wash the chicken breast under cold water and then pat dry with a paper towel. Lay the chicken breast on an antibacterial chopping board or a plate and score it in a crisscross pattern, making sure not to cut all the way thru.
 
This process makes the seasoning embed itself into the chicken, giving you delicious flavor through the chicken.


Finely mince, 1 teaspoon of each, garlic, pickled ginger and cilantro (coriander). Sprinkle sea salt and crushed red pepper over the chicken breast to taste and then press the minced ingredients into to your chicken.
 
 
Drizzle olive oil over the chicken and set your oven at 185C. I use a paper towel with olive oil and rub it along the bottom of a glass baking dish to bake my chicken.
 
Now you can prepare your cabbage. I slice my cabbage into long thin strips, wash it and place it into a medium stock pot. On top I add minced garlic, sliced red onion, and a spice mix that I prepare of 17 spice no salt seasoning, cayenne pepper, smoked sea salt, paprika powder, white pepper and dried oregano.
 
 
I drizzle a little vegetable oil over the top and turn it on a medium heat. I stir it around and only cook it until the cabbage and onions soften slightly. I like a nice crisp to the vegetables.
 
I prepare my couscous according to the box directions but I always use chicken broth instead of just water for more flavor. I stir in sliced green onion, cover and set aside until its time to serve.
 
I pop the chicken into the oven for 25 minutes or until the chicken runs with clear juice. 15 into cooking I sprinkle sliced green onion over the chicken.
 
When the chicken is done I take it from the oven and let it rest for 5 minutes. I place a chicken breast onto a bed of the spicy cabbage and the couscous next to this lovely fragrant birdie!


Now...
 
Go, eat!!
 
If you enjoy the recipes, please share my blog with your friends. If you have a recipe you'd like to share in Friendly Foods, please send it in. Photos are also appreciated! teedycooks@gmail.com
 

August 11, 2012

Glorious Food (Photos Only)

Organic Asparagus
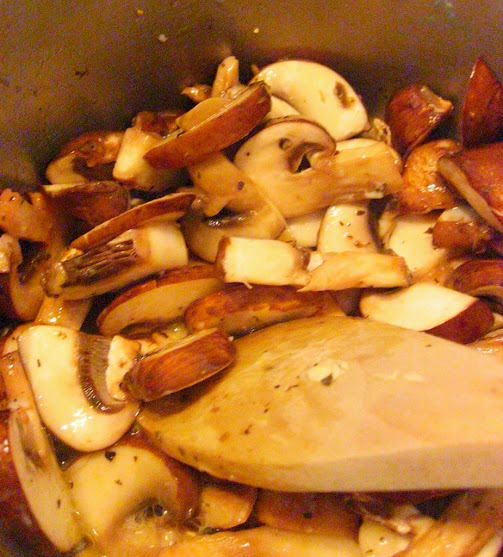
Fabulous Fresh Mushrooms sautéed in butter
Long Smoked Salmon
 

August 04, 2012

Spinach and Feta Breakfast Casserole

Egg casseroles are fantastic! You can use a wide variety of ingredients to make one so the options are endless. When doing this particular style casserole for brunch you can have Greek side dishes. For example, instead of regular toast you can have oven toasted pita and a Greek Salad. Be adventurous! Food can be an adventure.

This casserole has to be chilled at least 8 hours before baking, so it's perfect to prepare the night before and then pop it into the oven the following day. This recipe is great for a special breakfast or a brunch. The serving size is for 8-10 people but you can, of course, cut it in half.

Spinach and Feta Breakfast Casserole
Servings: 8 – 10

1 box of Caesar croutons
¼ cup butter
2 cloves garlic, minced
1 medium onion, chopped
2 10-ounce packages frozen chopped spinach, thawed and drained
2 cups shredded mozzarella cheese
1 cup crumbled feta cheese
10 large eggs
1 cup heavy cream
1 cup whole milk
¾ teaspoons Greek seasoning blend (recipe follows)

Greek Seasoning Blend

2 teaspoons dried oregano
2 teaspoons salt
1 1/2 teaspoons onion powder
1 1/2 teaspoons garlic powder
1 teaspoon cornstarch
1 teaspoon black pepper
1 teaspoon dried parsley flakes
1 teaspoon paprika
1/2 teaspoon ground cinnamon
1/2 teaspoon ground nutmeg
1/2 teaspoon thyme

Mix all of the herbs and spices together and store in an airtight container. It makes about 1/4 cup.


Lightly grease a 13-inch baking dish. Sprinkle croutons evenly over the bottom of the dish.

In a medium skillet, melt butter over medium heat. Add garlic and onion and cook for about 5 minutes or until tender. Add spinach and cook stirring constantly for 2 minutes. Remove from heat and spread evenly over croutons. Sprinkle mozzarella and feta evenly over spinach.

In a medium bowl, gently beat eggs. Don't over beat the eggs, there's more mixing to follow. Add cream and milk, whisking to combine. Pour over casserole. There should be no need to add extra salt. The cheeses are salty so you don't want to over do it. Sprinkle evenly with Greek seasoning blend, cover and chill at least 8 hours.

Preheat oven to 350F degrees. Bake 45 to 55 minutes or until top is puffed and golden brown. Let stand for 10 minutes before serving. Cut into generous squares to serve.

Now...

Go, eat!!

If you enjoy the recipes, please share my blog with your friends. If you have a recipe you'd like to share in Friendly Foods, please send it in. Photos are also appreciated! teedycooks@gmail.com

August 03, 2012

Mississippi Mud Pie

I first learned how to make this pie when I was about 13 years old. There was a cooking show that came on PBS in New Orleans in the days before The Food Network. I saw a little lady from Lafayette, Louisiana make this and I immediately began to aggravate my mom to get the ingredients. When she saw how simple it was she agreed and I insisted on making it myself.

When it was done, we were both surprised by how delicious it was. Really simple ingredients but lots of taste.

In the recipe below, I've substituted Cool Whip for homemade whipped cream. I like the taste of homemade whipped cream but you can, of course, use ready made whipped topping if you desire.


Mississippi Mud Pie

1/2 stick butter
1 cup flour
1 1/2 cups pecans, chopped

Mix butter and flour well. Add chopped pecans, mix until pecans are well coated. Press firmly into bottom of a 9 x 13 inch pan. Bake 20 minutes at 350 degrees. Let it cool for 1/2 hour.

FIRST FILLING:

1 (8 oz.) pkg. cream cheese, softened
1 &1/2 cups powdered sugar, divided
2 pints heavy cream, whipped to firm peaks with 1/2 cup of the powdered sugar.

Mix well and spread on crust.

SECOND FILLING:

1 package instant chocolate pudding
1 package instant vanilla pudding
3 1/2 cups cold milk

Mix well and spread on top of cream cheese mixture. Spread remaining whipped cream on top of pudding mixture and refrigerate.


This is a really fun dessert to make that can be made easily with tiny people. By tiny people, I mean kids. It's super tasty and has an incredibly fun name!


Now...

Go, eat!!

If you enjoy the recipes, please share my blog with your friends. If you have a recipe you'd like to share in Friendly Foods, please send it in. Photos are also appreciated! teedycooks@gmail.com


August 01, 2012

Vatican's Homemade Mayonnaise (Friendly Foods)

Eddie Cox and Vatican Lokey are two of my most favoritest people in the whole of the wide, wide universe. (I am aware there are grammatical and spelling issues in that sentence. It's intentional.) They have been true and amazing friends for many, many years. I grew up around them and watching them on stage helped me learn how to be a performer, not just a singer.

Eddie and Vatican are also very good friends with my mom, whom I call, Shorty Cupcake. I call her that because she's super sweet and stands only 4 foot 11 inches tall. They visit her often and look out for her since I'm on the other side of the Atlantic.


Vatican & Eddie!


Vatican is great in the kitchen and he has contributed some recipes to Teedy Cooks. He sent me a mail today with one of those tasty lovelies! You'll find the mail with his recipe for Homemade Mayonnaise below...Hi Sweetie,

Eddie suggested I send you the recipe for Shorty Cupcakes' favorite homemade mayo.

It looks more complicated than it really is.

The most important things to remember:
All the ingredients MUST be at room temperature.
The key to good mayo is patience at the beginning.
Each egg yolk can take up to but no more than 3/4 cup of oil. Any more than that will cause the mayo to separate and be ruined.

I look at mayo as more than just a condiment. I see it as another part of the total nutrition package we should be getting everyday. My recipe is not the basic, but I have worked to refine this recipe for maximum nutritional efficiency.

All the oils I use are cold-expeller pressed.

Tools
Spatula, Bowl, Electric mixer, tablespoon

Base
Yolks of 3 free range organic chicken eggs
1 Tbs dry mustard or 2 Tbs stone ground or spicy brown prepared mustard

Oil Mixture
1 3/4 cups canola or safflower oil
1/4 cup each toasted sesame oil and extra virgin olive oil
Blend thoroughly.

Acid Mixture
3 Tbls. Unfiltered Apple Cider Vinegar
1 Tbl. Balsalmic Vinegar or Salata Salad Vinegar
1 Tbl. lemon juice
1Tbs. Liquid Amino Acids (or comparable amount low salt soy sauce)
2 tsp onion powder
1 tsp garlic powder
1/8 tsp stevia extract powder
2 Tbs. nutritive yeast flakes, dissolved in mixture (optional)
Mix these together thoroughly and set aside.

Final Ingredient
3 Tbs. boiling hot water

Start the water boiling now. On the highest speed possible beat the egg yolks for at least a full minute or until they get lighter and more viscous. Add the mustard and beat again for another minute. At this point begin adding the oil to the mixture one tablespoon at a time. (IMPORTANT! You cannot stop adding the oil for any reason until you have added at least a third of a cup. If you stop before that point the mixture collapses and you have to start all over again.) Constantly push the splatter back into the mixture to ensure even distribution of the oils. After the 1/3 cup has been added you can add the acid mixture by single tablespoons and mixing well in between doses. Be careful with the acids to oil ratio. Too much acid makes the mayo thin.

Once you have used up all of the oil and have the consistency you like, add the tablespoons of boiling water to the mayo one at a time. The boiling water sets the sauce and prevents it from separating.

Place into a clean jar with a good seal and refrigerate for at least an hour before using.

You will be very, very surprised at how good fresh homemade mayo can be. With time the process becomes second nature. I have not bought prepackaged mayo in the stores for over two years, and I even give batches to friends on a regular basis.


Now...

Go, eat!!

If you enjoy the recipes, please share my blog with your friends. If you have a recipe you'd like to share in Friendly Foods, please send it in. Photos are also appreciated! teedycooks@gmail.com

- Posted using BlogPress from my iPad


July 30, 2012

Chicken Salads, A Delicious Alternative to a Sandwich for Your Bag Lunch

My friend, Ingvild sent me a message asking for a healthy meal to pack for a long day at work. Whenever we think bag lunch, the first thing that comes to mind is a sandwich. Now, don't get me wrong, there are some great sandwiches out there, but sometimes you want something different.

I have a few wonderful, flavorful and healthy Chicken Salad recipes to add some variety to your lunch bag.


Waldorf Chicken Salad

1/2 cup chopped walnuts
3 cups chopped cooked chicken, cubed
1 cup seedless green grapes, halved
1 large Gala or Jazz apple, diced
1 cup diced celery
1/2 cup mayonnaise
1/2 cup honey mustard ( if you don't have honey mustard, mix 1 part honey to 2 parts Dijon mustard)
Salt and pepper to taste

Preheat oven to 350°. Bake walnuts in a single layer on a cookie sheet 6 to 8 minutes or until toasted. Stir around at the halfway mark.

Mix together chicken, apples, celery, mayonnaise, mustard and walnuts. Add salt and pepper to taste.

I like to serve this on a bed of romaine lettuce or if you prefer a softer green to contrast with the crunchy apples use a bed of watercress.

Now here's my next Chicken Salad:


Chicken Salad with Olives and Couscous

1 cup uncooked Israeli couscous
1/4 cup chopped pitted kalamata olives
2 tablespoons chopped fresh flat-leaf parsley
1 tablespoon chopped capers
2 tablespoons extra virgin olive oil
1 tablespoon fresh lemon juice
1/4 teaspoon salt
1/4 teaspoon freshly ground black pepper
1 garlic clove, minced
2 cups boneless, skinless chicken breasts, cooked and cubed

Cook couscous according to package directions, omitting salt and fat. Drain and rinse with cold water.

In a large bowl, combine olives, parsley, capers, olive oil, lemon juice, salt, pepper and garlic, stirring with a whisk. Add couscous to olive mixture; toss gently to coat. Stir in chicken just before serving.

If you're taking it for lunch, put your couscous and olive mixture in a separate container from your chicken and mix together before you eat.


Now...

Go, eat!!

If you enjoy the recipes, please share my blog with your friends. If you have a recipe you'd like to share in Friendly Foods, please send it in. Photos are also appreciated! teedycooks@gmail.com

- Posted using BlogPress from my iPad

Halibut with Mushroom and Shrimp Sauce

Poaching fish is something that's very common in Scandinavia. It's a delicious and healthy way of cooking fish while infusing it with whatever spices and herbs you add to the water. Here in Norway, they often make a white sauce or serve the poached fish with butter and plain or seasoned sour cream.

This is my Creole spin on this delicious poached fish. A creamy and delicious sauce made with the stock from the poaching, mushrooms and shrimp. I hope you like it!

Halibut with Mushroom and Shrimp Sauce
Serving Size: 5

2 ½-pounds white fish-halibut, cod, snapper, pollock
1-tablespoon salt
3 bay leaves
1 sliced onion
1-teaspoon thyme
½ teaspoon onion powder
½ teaspoon celery seed
1-cup celery leaves
1/3-pound mushrooms

SAUCE

2 tablespoons butter
3 tablespoons sherry
18 shrimp
1-clove garlic
¼ cup butter
½ cup flour
1/8-teaspoon pepper
¼ teaspoon celery salt
¼ teaspoon onion powder
1chicken bouillon cube
1½ cups milk

Wash 2 1/2 pounds of white fish and tie in a cheesecloth bag. Poach gently in 2 quarts of water seasoned with salt, bay leaves, onion, thyme, onion powder, celery seed and celery leaves until fish is firm (about 10 minutes). Remove fish from water, drain (keep fish stock), and remove bones and skin. Cut into individual servings.

Sauce: Melt 2 tablespoons of butter in pan and sauté clove crushed garlic, sherry, shrimp and mushrooms.

Melt ¼ -cup butter or margarine in saucepan over low heat. Stir in flour, pepper, celery salt and onion powder. Remove from heat and slowly add chicken bouillon cube dissolved in 1 cup of strained fish stock and milk. Add mushrooms and shrimp.

Butter a baking dish and spread a thin layer of sauce over the bottom. Lay fish on top of the sauce. Cover with remaining sauce. Bake at 350ºF for 15-20 minutes, or until fish flakes easily with a fork.

Now...

Go, eat!!

If you enjoy the recipes, please share my blog with your friends. If you have a recipe you'd like to share in Friendly Foods, please send it in. Photos are also appreciated! teedycooks@gmail.com

- Posted using BlogPress from my iPad

July 29, 2012

Caribbean Jerk Seasoning

My dear friend Michelle was born and raised in Jamaica but has lived in Finland for over 20 years. She and I enjoy spending time together laughing, drinking and cooking. Her husband, Arto, loves these meetings because he knows that good food is his reward when she and I get together.

I once called her from Norway to ask her to send me some jerk seasoning. It's a flavorful, spicy and unique Caribbean seasoning blend that is used on several types of Jerk dishes. It can be used on chicken, fish, lamb, pork and goat. I've also done Jerk Turkey.

Well, Michelle told me there was no need for her to send me Jerk Seasoning, she said I probably had everything I needed to make my own. Here I share this fantastic blend of Caribbean goodness

Caribbean Jerk Seasoning

1 tablespoon onion -- finely minced
2-teaspoons garlic -- finely minced
1-teaspoon kosher salt
1-teaspoon allspice -- ground
¼ teaspoon nutmeg -- ground
¼ teaspoon cinnamon -- ground
2-teaspoons brown sugar
2-teaspoons black pepper
2-teaspoons cayenne pepper
½ teaspoon dried thyme
1 tablespoon vegetable oil

Mix together minced onion, garlic, oil and spices and rub over meat. If using for chicken or fish rub the mixture inside and out.

Makes enough rub to coat a whole pork, beef or lamb roast. Makes enough rub for a whole chicken or a large, whole fish.

If you want to make a rub for later use, use dried minced onions & garlic instead of fresh. Fresh onions & garlic can create harmful bacteria if stored with the other ingredients over a period of time.

Now...

Go, eat!!

If you enjoy the recipes, please share my blog with your friends. If you have a recipe you'd like to share in Friendly Foods, please send it in. Photos are also appreciated! teedycooks@gmail.com

- Posted using BlogPress from my iPad

July 27, 2012

Banana Curried Chicken

This is my take on a fantastic Caribbean chicken dish that I tasted many years ago while performing at a World Music festival. The dish was creamy and slightly spicy. The bananas gave a delicious mild sweetness to the dish. I hope you enjoy this as much as I do.

The trick to cooking savory dishes with banana is to make sure they're only slightly ripe. You want them yellow with a bit of the green still showing. Too ripe and they turn into mush in the dish.

Banana Curried Chicken
Serving Size: 10


2 onions -- chopped
2 tablespoons cooking oil
¼ cup all purpose flour
1-cup chicken stock
1-teaspoon salt
2 pounds cooked and cubed, boneless skinless chicken
5 sliced slightly ripe bananas
2 grated firm green apples
2 tablespoons grated lemon zest
1-tablespoon raw sugar
2 tablespoons Jamaican curry powder
1 bay leaf
1 teaspoon cayenne pepper
1 cup sliced green onion
1-cup cream

Fry onions in oil until light brown. Add flour and mix well. Add chicken stock gradually while stirring. Add the rest of the ingredients, except cream, Cover saucepan and simmer for 20 minutes. Remove bay leaf. Mix in cream and green onion just before serving. Serve on a bed of steamed rice.


Now...

Go, eat!!

If you enjoy the recipes, please share my blog with your friends. If you have a recipe you'd like to share in Friendly Foods, please send it in. Photos are also appreciated! teedycooks@gmail.com

- Posted using BlogPress from my iPad

July 25, 2012

Italian Ricotta Cheesecake (Friendly Foods)

Greg was always a welcomed part of the Boutté Clan when he lived in New Orleans. It didn't hurt that he could make some of the best authentic Italian desserts in town! Here's a little demo of that talent.

Italian Ricotta Cheesecake
Makes 1-9" cake
Submitted By Greg Duva


I grew up in a New York Italian family in the NYC area, and ate this often growing up, before the little Italian-American bakeries in New York City and its metro area started to disappear.

I recently started making it again after my friend Tommy Lavin (himself a very good cook) complained to me of "traditional" American cheesecake recipes being too sweet. When I dusted off this recipe for him, I realized I hadn't made it myself in many, many years, so I started making it myself again. Good choice.

Simple and quick to prepare, the time for this recipe is largely consumed by the baking and then cooling the cake under refrigeration overnight, which it really should be if the texture is to be the best it could be. Enjoy!


Set 2 pounds of ricotta cheese out to get to room temperature.

Whole-milk ricotta is best, but part-skim will work as well. I've found that the cheapest ricotta works the best. If the American industrial brand Polly-O is all you can get, use it, but be aware that it contains an excessive amount of moisture, and you may have to reduce the eggs in the recipe. It's a judgment call you'll have to make.


Pre-heat oven to 350 degrees.

For the crust, I like to use 3 slices of fresh sliced bread...pulse the bread in a food processor or crumble between your hands until you get crumbs of the consistency you like. Crumbs do NOT have to be fine if that's not what you dig. Melt about 3 tbsp beurre. Add 2 or 3 tbsp of dark brown sugar to the crumbs in a mixing bowl, a tiny pinch of salt, a shot of fresh, real vanilla and toss to combine evenly. Add the melted butter slowly and mix until the crumb mixture just holds together. You may NOT need to use all the butter. Press the crumb mixture into the bottom of a 9" spring form pan. You can press it about 1/2 inch up the sides, but it's not necessary to have much of a side-crust. Place the spring form pan with the crust in the center of a 350 degree oven and bake for 10 mins. Remove and allow to cool while you are preparing the filling.


Reduce the oven temperature to 300 degrees.


Scrape all of the room-temperature ricotta into a large mixing bowl with a rubber spatula. Add 2/3 c of sugar (refined white is fine, but I use organic sugar or turbinado sugar), 1 tsp sea salt, 1 tbsp of fresh vanilla, 1/3 cup Amaretto di Saronno, and the zest of 1 lemon, and use a heavy whisk to combine, being careful to make sure the mixture is smooth and free of lumps.

**You can also use a small amount (1 teaspoon or less) of ground cinnamon as flavouring. Sometimes I do, sometimes I don't. Alternatively, if you can find a good, pure cinnamon oil, you can add a drop or three (be careful, it's very strong!) of oil as a flavouring. Experiment, see what you like!

Now, add 5 eggs ONE AT A TIME, mixing thoroughly each time you add another egg. As I noted above, if you're using American industrial ricotta and/or a brand that looks to be very moist, reduce the eggs to 4 in this recipe.

When the mixture looks to be lump-free, add 1/3 farine (All-Purpose flour) and mix well to combine. You don't want to over-mix and develop the gluten in the flour, which will make for a tough and non-tender cake, but do make sure the flour is evenly combined with the ricotta mixture.

Be sure to taste the mixture before you turn it into the prepared crust.


When the ricotta mixture looks to be smooth and lump-free, use a rubber spatula to scrape into the prepared spring form pan. Place into the center of the oven (NO water-bath is necessary), and bake for 35 minutes before rotating completely. Be very careful as you rotate the cake!

Check the cake with the blade of a thin-bladed knife after the second 35 minutes of baking time. If it comes out clean, the cake is done. If not (and this is most likely the case), continue baking for another 10-15 mins. Until knife comes clean.

Remove from the oven and cool on a wire rack for an hour or so, then place the cake in the refrigerator overnight before serving.

I like to serve some good, fresh wild strawberries made into a sauce of their own juices. To prepare this, top the strawberries (save the tops and leaves to use in strawberry iced-tea) and slice into a mixing bowl. Slice one fresh vanilla bean lengthwise and scrape the seeds from the bean (and your fingers) into the strawberries, and dust the top of the strawberries lightly with sugar. Toss GENTLY by hand to combine the strawberries, sugar and vanilla. Lightly dust the top of the strawberry mixture with sugar a second time, and gently toss again. Place the bowl under refrigeration for at least 30-45 mins. To allow the juices to render and combine with the sugar and vanilla. The wild strawberries make their own sauce this way.

Now...

Go, eat

If you enjoy the recipes, please share my blog with your friends. If you have a recipe you'd like to share in Friendly Foods, please send it in. Photos are also appreciated! teedycooks@gmail.com


- Posted using BlogPress from my iPad

July 24, 2012

It's All About The Grill (with Photos)

Summertime was always special around my house when I was growing up. My mom was a grilling machine! She didn't care what the weather was, if she could get the fire started, she was going to grill. Rain or shine.
 
I inherited that same desire to grill, no matter the weather. I have to tell you, living on the west coast of Norway, makes this a continuous challenge. The weather is often wet and windy in the summer. And yet, I persevere! My neighbors used to look at me quizzically when they'd see me lighting the grill when the clouds of impending rain were overhead, but now they just smile and make the polite Norwegian, "ooh, that smells good" face. Norwegians are far too polite to come over and say, " girl, that's smelling good! What you got going on over here!?" Everyone who knows me, understands that I'd be happy to share the grub!! That's what it's all about!
 
Peto and I are big fans of Veggie Packs on the grill. Vegetables love the grill. You don't only have to skewer them to cook them on the grill. Below I have some lovely Veggie Packs,
A Lovely Leek...
 
 
Leeks are a delicious sweet and mild part of the onion family. I first cut off most of the green top and slice it straight down the middle.


Then rinse in lots of cold water. Leeks and green onions (scallions) tend to have sand hiding in between their layers. It's not cool to crunch on sand while you eat.
 
Then, I cut the washed halves into halves and place it on double layered heavy duty foil.


Drizzle over good olive oil and sprinkle with sea salt and a light pinch of Creole Seasoning. Don't over season, you want to taste this lovely vegetable. Lay some sprigs of your favorite herb on top. I chose oregano.
 
 
Oh, it's so pretty! I can't help myself. One more!
 
 
Wrap up the leeks in a nice package and sit aside.


Next Veggie Pack is zucchini with mushrooms, garlic, red onion, a little bell pepper and basil.


Chop your vegetables in thick chunks except for the garlic and bell pepper, mince those.


Place the vegetables on doubled heavy duty foil and season them as desired and drizzle with olive oil. Then, sprinkle whole basil leaves over the top.


Gorgeous!! Now, wrap it up in a nice package and set aside to wait or the grill.


I place the Veggie Packs around the edges of the grill before I begin to cook the meat or fish. They need to go a bit longer in the packs.
 
I get my grill prepared and if the weather is good, I set up outside in our pavilion.


After about 25-35 minutes my packs are ready to come off the grill.


I served my Veggie Packs this day with Ginger & Maple Smoked Pork Chops and Honey & Soy Drumsticks.


Now...
 
Go, eat!!
 
If you enjoy the recipes, please share my blog with your friends. If you have a recipe you'd like to share in Friendly Foods, please send it in. Photos are also appreciated! teedycooks@gmail.com
 
- Posted using BlogPress from my iPad
 

Baked Fish in Brown Paper Bag (with Photos)

This is a great fish dish. I also like to add other veggies, like fresh string beans or asparagus. It's also tasty to top with small shrimp or crawfish tails. The photos are done with shrimp and asparagus.

Baked Fish in Brown Paper Bag
Serving Size: 2

2 large fish fillets (use a hearty, firm fish. I used sea bass)
1 medium brown paper lunch bag
Olive oil
1/2 medium rutabaga, peeled and cut into small cubes
2 medium red potatoes, washed and cut into small cubes
2 teaspoons garlic, finely minced
1 tablespoon shallots, finely minced
1 bunch green onion, sliced
Fresh grated ginger, about 2 teaspoons
Salt & cayenne pepper

Preheat oven to 350ºF.

Wash the fillets and put aside. Take the paper bag and spread oil (1-3 teaspoons) all over the inside, outside and bottom of the bag so that it is shiny, but not dripping with oil.


Spread the minced garlic, shallots and ginger over your fish. Sprinkle with salt and pepper. Cover the fish with the diced potatoes and rutabaga. Top with sliced green onion. If you add shrimp, add before root veggies.


Now, place the filets into the oiled bag. Fold the open end of the bag over several times to make sure it is well sealed. Place the packages on a cookie sheet when done.

Place cookie sheet in the oven and cook for about 35-40 minutes. The paper bag puffs and turns a darker brown. When you open it up, remember, it's been steaming inside, so watch your hands and face! Be Careful! Enjoy!


Now...

Go, eat!!

If you enjoy the recipes, please share my blog with your friends. If you have a recipe you'd like to share in Friendly Foods, please send it in. Photos are also appreciated! teedycooks@gmail.com

- Posted using BlogPress from my iPad