August 14, 2016

Stuffed Cabbage Rolls - A Lil Bit Different!

This recipe is a revisited version of the cabbage rolls I've done before. I've always done the rolls with cooked meat, sautéed veggies and cooked rice. This version is closer to the authentic version of cabbage rolls. I use fresh, uncooked ground beef, fresh chopped vegetables and cooked rice for the stuffing and allow the stuffing to cook inside the rolls and then I made a fresh tomato purée as a topping.


Ingredients

500g fresh ground beef (lamb or pork can be used)

1 medium yellow onion diced in small pieces

2 cloves garlic, minced

1 tbsp fresh chopped parsley

1/2 tbsp fresh chopped oregano

Salt & pepper to taste (I use red pepper flakes)

2 tbsps milk

2 tbsps good quality maple syrup

1 large head of cabbage, whole and cored

Paprika (to taste for garnish)

2 tbsps butter

1-1/2 cups cooked rice, either white or brown


Tomato Purée

2 ripe plum tomatoes, diced

1 small red onion chopped

Salt & Pepper to taste

1 tsp sugar

1 tbsp creme fraiche


Directions

In a large bowl combine meat, spices milk and rice. Blend well but don't over work the meat. It makes the stuffing dry and too tight. Cover with plastic wrap and rest in the refrigerator for at least 1/2 hour.


In a large pot of salted water place cabbage, whole, cored side down covered and bring water up to just before boiling. Turn off and leave covered just long enough for leaves to loosen easily and become slightly flexible for wrapping. When it's cooled enough to handle, remove from pot let it drain and slowly. Work off the loose leaves, whole.


Preheat oven to 195C. I use a clean kitchen towel to work on making my rolls. Place a leaf so that it cups upward. I put about 2 rounded of tbsps of meat onto the thick part of the leaf and do an egg roll type roll, folding in the side as I go along. And place them close together in the baking dish.

Drizzle the maple syrup over the rolls, sprinkle with more salt and pepper and put pats of butter on each roll. Sprinkle paprika powder over the tops.

Cover tightly and bake for 35-40 minutes


In a food processor or blender purée the tomatoes, onions, salt, pepper, sugar and creme fraiche. Spoon the mixture over the rolls and bake for another 10-15 minutes uncovered. I also top with some chunky pieces of red onion for texture. I like to serve these with sautéed red new potatoes. You can have them with any side you like or just on their own

This is my variation of a dish I learned from a dear friend in Finland many years ago. It's a favorite in our household and I know you'll love it too. These rolls can be made, baked and frozen for later. Make the tomato purée before reheating.

If you make the dish, please share it with me. I'd love to know any changes or vegan/vegetarian versions you may come up with. Go on and make some pretty food!!


October 25, 2015

My First Homemade Fresh Cheese!


For the first time ever, I made fresh cheese!! Woohooo!!!!

For folk who know me well, they know that I love cheese the way most women love chocolate. If I'm blue, I eat cheese. If I'm happy, I eat cheese. Let's face it, I eat cheese!

I suffer with respiratory problems and congestion so I have to pick my dairy battles very carefully. I am not a milk drinker, like most folk here in Norway, I don't eat ice cream on a regular basis so my dairy products of choice are generally yogurt, skyr and cheese. I usually lean toward dry cheeses as they don't affect me as adversely as creamier cheeses but I adore creamy cheese!!! I do, I do, I do!

This was my first stab at making cheese so I wasn't going to go to crazytown and try some difficult process using rennet. Ya gotta crawl! So, my first try I looked up some ways to make a creamy, fresh cheese using yogurt as a base and an acid instead of rennet.

For the acid you can use vinegar, citric acid or a citrus fresh juice. I used lime juice, since that's the fresh citrus I had available at the time. I always have plain or Greek yogurt in my fridge. I don't ever buy low fat or light products. I'm of the firm belief of using things in their natural, full fat state, just be smart about your intake. Very often strange chemical processes are used to make things "light". I don't dig it.
Plus, to make cheese you need to have the dairy in its full fat, natural state.

For this yogurt cheese I used a beautiful full fat Greek yogurt. I placed 2 cups into a piece of cheese cloth and into a strainer over bowl. I used a rubber band around the cloth, put a saucer on top and placed a heavy can on top of the saucer to put pressure on the yogurt mixture. This process slowly presses the whey from the yogurt. I left it in the fridge overnight. I the morning I was left with a very firm yogurt with a soft cream cheese like consistency. You can stop at this point and season this creamy mixture to spread onto bread or crackers but I wanted a firmer more fresh cheese consistency.


This is the yogurt after the whey has been strained.

I mixed in 1 tablespoon of fresh squeezed lime juice, 1 teaspoon pink salt, crushed red pepper flakes (to taste) and I minced 1 tablespoon fresh rosemary. You can use any spices you'd like or none at all. Salt is necessary for proper flavoring of the cheese, even if you plan to have plain cheese to add a fruit preserve on top.


After I mixed in the spices and herbs, I spooned the mixture onto a fresh cheesecloth and tied it off with a rubber band and use the same process of placing a saucer and heavy can on top.


I let it sit in the fridge for 2 days, making sure the can was putting good pressure on my mixture. After 48 hours, I unwrapped the cheesecloth and I was left with this semi-firm, lovely round of fresh cheese!


It has a tangy, lightly spicy flavor with the hints of rosemary. I served it on bread slices and crackers drizzled with a fragrant olive oil and some Crimson seedless grapes.


I'm going to try some more adventurous recipes for cheeses as I become more comfortable with the process but for a first try, this was amazingly easy and very tasty!

Don't be afraid to try new recipes. This one was not expensive so if it doesn't come out great the first time you try, no big deal. Just start over and try it again! Cooking is about trying new things to find out what works best for you.

Now, GO EAT!!

If you enjoy the recipes, share them with your friends! #teedycooks


Spicy Barbecue Sauce


Oh yeah! Barbecue sauce is a lovely thing. Homemade is even more lovely. Whenever I've bought prepared barbecue sauce I've always had to "dress it up" before I was satisfied with the taste, so I figured why dress up something when I can just make it myself? Plus I like the control of what's going into my food. When I read the ingredients on so many prepared condiments, I'm a little frightened of the weird unrecognizable things they contain.

I searched online for basic barbecue sauce recipes and found some pretty simple ones to use as a base. This is what I did for my go to sweet and spice sauce.

Ingredients:

1 can crushed tomatoes, no spices or flavoring added
1 tbsp tomato paste
2 tsps Worsterschire Sauce
1 tbsp lime juice or lemon juice, fresh squeezed, you can use vinegar instead
2 tsps garlic, minced
1/4 cup onion, minced
1 tsp dried oregano
1 tsp dried basil
Minced red chili to taste, I use 2 tsps
1 tbsp dark brown sugar
1 tbsp olive oil
Salt to taste

Directions:

In a saucepan over medium high heat, place olive oil and tomato paste. Stir constantly for 5-7 minutes and then add garlic and onion, stirring constantly for another 2-4 minutes until you smell th fragrance of the garlic and onion rising over the tomato paste. Drain som of th liquid from the canned tomatoes nod add to the saucepan. Turn down the heat to medium. Add 1/2 of the minced chili and the remainder of your ingredients and turn th heat to low and simmer for 30 minutes, stirring occasionally so it will not stick. The sugar from th ingredients will cause it to thicken.

When the sauce is complete, remove from heat and stir in the remainder of your minced chili. I like to have little bites of spice in my sauce.


This sauce is sweet and spicy and goes well on chicken or meats. It's also really cool on small cocktail meatballs. It can last for about 1 month in an airtight container kept in the fridge.

Now, GO EAT!

If you enjoy the recipes, please share!
#teedycooks


October 22, 2015

Happy Lunchbox, Wraps!


My husband spends 12+ hours a day in his tractor. He often works along countryside roads where there no place to stop and find lunch. When I'm not on tour, I love making him a lunchbox to take with him. I enjoying thinking up new, cool meals that can be easily packed and eaten while he's on the road.

More people are taking their own lunches to work and school. You have better control over what you're consuming and its sooooooo much cheaper than paying for meals at cafés everyday.

We all know how to make a tasty sandwich or salad, but I thought it was time for a wrap in that box.
Wraps can be made with any meats, fish or all veggies. Roasted or grilled veggie wraps are fantastic! Add beans, seeds, nuts or tofu to boost your protein content to ensure you'll be full and have great energy.

For this wrap I decided to make pulled pork. I bought a small, inexpensive pork roast. Seasoned with Creole spices, cumin, fresh cilantro and stuffed it with garlic. I put it into the slow cooker on low for several hours and let it get tender and fabulous.

When it was cooled it put it into a large bowl, along with the juices from cooking and shredded it using two forks.


For my Cole slaw I followed a basic slaw recipe but I replaced the mayonnaise with Greek yogurt and coconut oil. Choose healthier fats whenever possible. I added grated horseradish for a nice spicy kick.
I placed a bed of fresh baby spinach and then slaw on my tortilla. I use plain large flour tortillas for Fuzzy, I prefer using whole wheat for myself. You can use any variety you'd like.


Sprouts and little squirt of coarse mustard...


Then top it with your shredded pork...


Roll it up and wrap it in wax paper or aluminum foil. Wraps can be fun, versatile and they're easy to pack and eat. When you keep your meal choices interesting you tend to avoid poor habits.

Now, GO EAT!!

If you enjoy the blog, please share with your friends. #teedycooks

October 21, 2015

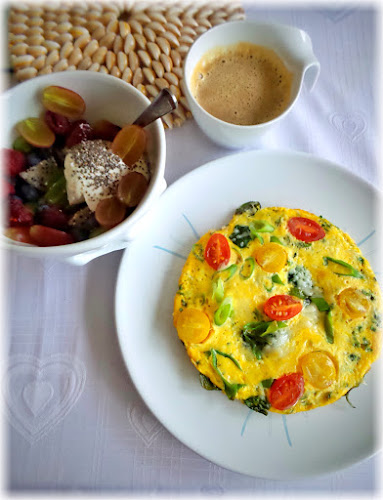
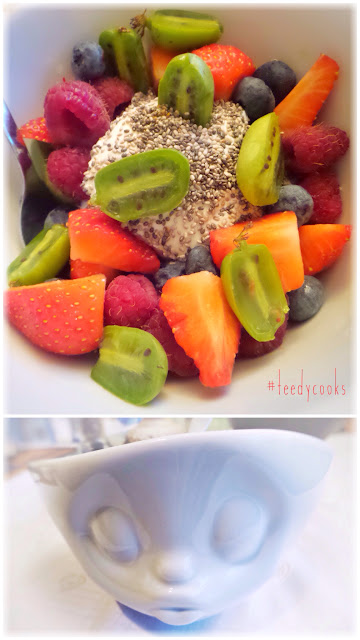
#BeautifulBreakfast, Go Eat!

For the past several months I've been concentrating on breakfast. The reason being, it truly is the most important meal of the day. It jump starts your metabolism and it's where you get your first energy blast. It's pretty well known that fresh, colorful foods carry all the goodies you need and honestly, who doesn't like beautiful food?


I've also been making a great effort to incorporate better grain choices into my diet. I limit my bread intake, I choose brown, red or black rice, bulgar, barley and quinoa. I eat more sweet potatoes and yams instead of white potatoes. I haven't removed grains completely as I have no desire to take good carbohydrates from my diet. I like balance. I also choose smarter oils and fats. I use more yogurt, kesam and skyr instead of sour cream. I've also added more movement to my daily routine. I'm pretty sedentary and that's not working for me anymore!! I'm in the 45-55 age range now. Gotta keep thing working properly. Yoga and trying to add 10,000 steps daily has been my new regimen. Flexible fatty, baby!!!! You don't have to be skinny to be fit.

Make smart choices when you eat. Eat clean, colorful, beautiful, fresh foods and move ya body! It makes your brain and belly hole so much happier. Now, look at these #beautifulbreakfasts and GO EAT!! and move.

August 09, 2015

Midnight Beauty Grape Jam, Pic Pop!

I made homemade jam for the first time!! Woohoo!!
I used these beautiful Midnight Beauty Grapes and I must say, I am happy with the results. Where's the peanut butter, baby?


Now, GO EAT!

If you enjoy the recipes, please share!
#TeedyCooks

August 08, 2015

#BeautifulBreakfast Part 1

I've started a yoga regimen and along with that, I've been making high protein, beautiful breakfasts. Here are some and many more to come!


Now, GO EAT!!